Migrating Windows 11 data to SSD means transferring all your data from your old internal drive with Windows 11 to an SSD. Most users migrate data from hard drive to an SSD to boot Windows 11 faster. There are various reasons why one should migrate their Windows 11 to SSD. But the most common reason is to improve system performance since SSDs are faster compared to HDDs.
Table of Contents
How to select an SSD for Windows 11 migration?
Selecting an SSD for Windows 11 migration is quite simple. All you need to do is to check with the storage capacity of an SSD. Since you would transfer all your hard drive data to SSD, it is advised to buy an SSD with larger storage capacity compared to the data saved on your internal hard drive.
In case, if you lose your hard drive data due to interruptions while transferring or due to any data loss scenario, then you need not worry! You can use Remo Hard Drive Data Recovery which is an advanced tool to restore data under various scenarios. This tool is compatible with all the latest versions of Windows including Windows 11 and its previous versions. Remo Recover software is designed with a user-friendly interface to restore more than 300 file formats such as photos, videos, and many more.
Another important factor to consider is the physical size of the SSD. Make sure it fits properly in your laptop/ hard drive compartment. The common mistake most users do while purchasing an SSD is they just ignoring the disk size. With right SSD size, you can easily replace your hard drive in your laptop. Some, laptops will have spare bays, where in you can easily install your SSDs without actually removing or replacing the internal drive.
In this article, we will guide you with a reliable way of moving Windows 11 to an SSD to speed up your system performance.
How to Migrate Windows 11 to an SSD?
1. Take a backup your PC
One of the most crucial things to do before migrating Windows 11 to SSD is to take a backup of all your important files. Backing up Windows 11 can help you avoid data loss scenario. You can either take a backup by creating a Windows system image (File History) on external hard drive or by using Microsoft OneDrive.
Steps to take a backup using File History on external HDD:
- Connect external hard drive to your Windows. Make sure it has more storage capacity compared to your system drive.
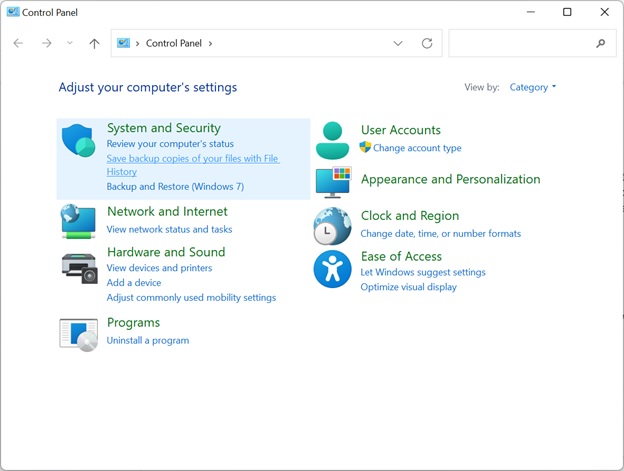
- Type Control Panel on your Windows 11 search box.
- Under System and Security, click on the Save backup copies of your files with File History option.
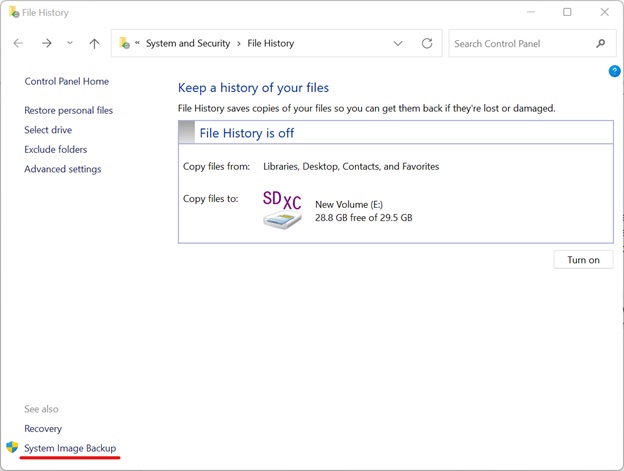
4. Now, select System Image Backup and then click Create a system image option.
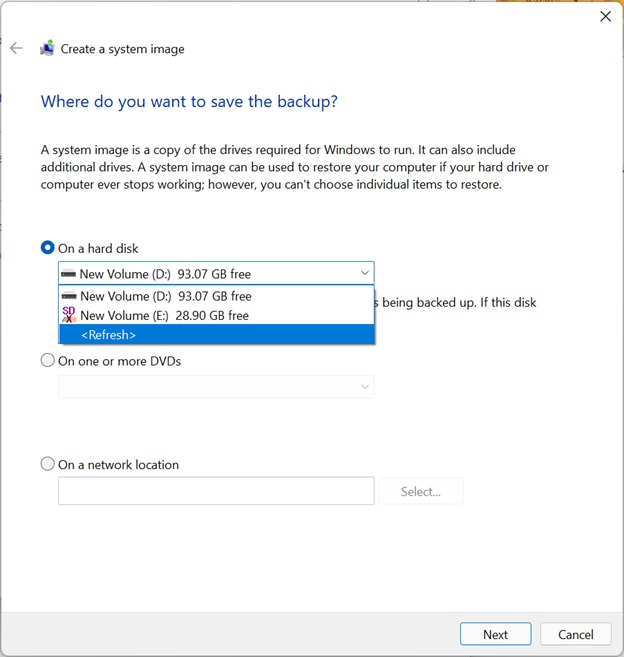
5. Now, select the external hard drive on which you want to save the system image and follow the self-explanatory steps to start the backup process.
2. Connect the new SSD to your Windows 11
Before Windows 11 migration, you need to connect a new SSD to your computer and make sure it gets detected properly on the system. At any time, SSD with a larger storage capacity compared to the C drive (system drive) is preferred. There are 2 ways in which you can connect the SSD to your Windows 11:
- Installing your SSD on hard drive bays using SSD adaptor and later connecting the SSD to the motherboard using SATA cables.
- If you are using an M.2 SSD, then you can directly install it into the spare bay on the motherboard without removing the internal hard drive.
3. Initialize newly installed SSD using Disk Management
Windows 11 doesn’t show the new SSD until they are initialized and partitioned in the Disk Management. Follow the below steps to initialize your new SSD on Windows 11;
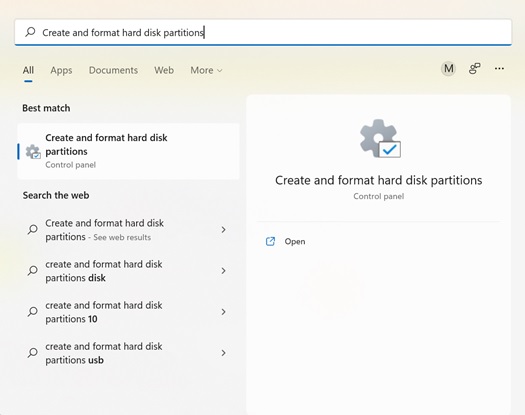
- Once you have connected SSD to your system, type Create and format hard disk partitions in Windows 11 search box and open it.
- Now, locate and right-click on the SSD and select Initialize Disk.
- Finally, set the SSD as GPT.
Note: Do not select MBR to initialize SSD since Windows 11 can only boot from drives that are formatted using GPT and not MBR.
4. Cloning the hard drive
Now, you need to copy the entire data of your PC to SSD including all the information that enables you to boot to the operating system from the SSD. To do so, you can download any reliable disk cloning software and try copying your hard drive data to the newly installed SSD.
Once, cloning is completed, turn off your system. And start replacing the hard drive with the newly cloned SSD. Make sure, you properly remove the screws from the old drive and replace them to connect the newly cloned SSD. In case, if you want to just boot the system from a newly clone SSD without removing the hard drive, then you can do it by changing the boot settings in BIOS.
5. Reboot from the new drive
- If you have replaced the old hard drive with a new SSD, then just press the power button, and your Windows 11 will automatically start booting from the new cloned SSD.
- If you have not removed/replaced the old hard drive, then you need to instruct BIOS to boot up from the new SSD drive.
- Press your laptop’s power button and hold the F1/F2 or DEL key depending on your system. This is to open the UEFI setup screen in BIOS.
- In the UEFI menu, go to the Boot section and set your computer to boot from the new SSD drive.
- Now, save the changes you made in BIOS and Restart your Windows 11. Finally, your Windows 11 system will start booting from the new SSD.
Hopefully, using our article you can find it easy to migrate your Windows 11 to a new SSD. Make sure you follow all the guidelines properly and take a backup of your data. In case of any data loss scenario, you can use Remo Recover software which is free to download and safe to recover data from your computer or SSD.
About Author:
John Harris works at Remo software as a Senior Content Editor. He has more than 8 years of experience in technical content expertise and strategy. His area of focus includes Data Recovery for both Mac and Windows, Windows troubleshooting, Issues related to partitions, file systems, operating systems and many more. You can find his profile on Remo software website and find more than 500 articles that reflect is authority on topics like like the SD card, USB, external hard drive, issues related to data recovery, etc.