![Move Emails from OST File to Office 365 Account [2024]](https://www.computertechreviews.com/wp-content/uploads/2021/06/How-to-Move-Emails-from-OST-File-to-Office-365-Account.jpg)
Table of Contents
Introduction
Move Emails from OST File to Office 365 Account – There are many reasons why you might want to move emails from an OST file to Office 365 (Microsoft 365). Some of them are:
- Moving your emails from an on-premises Exchange mailbox to a cloud account in Office 365
- Moving emails from one system to another
- Exporting emails from an inaccessible/orphaned OST file to Office 365
This article will explain manual and automated methods to move OST emails to Office 365.
Methods to Move OST Emails to Office 365
Below given are two methods that you can use to move all or selected emails from an OST file to an Office 365 account.
Method 1 – Export OST Emails to PST and Upload the PST File to Office 365
IMPORTANT! This method will only work if Outlook is installed on your PC and connected to an Exchange account. Also, the manual process can take a significant amount of time. You may try a 3rd party OST to PST converter tool to directly export emails from an OST file to Office 365.
The manual method involves two steps:
Step 1: Convert OST File into PST
Step 2: Upload the PST File to Office 365 Account
Let’s discuss these steps in detail:
Step 1: Convert OST File into PST
Convert the OST file, from which you need to move emails, to a PST file by executing these steps:
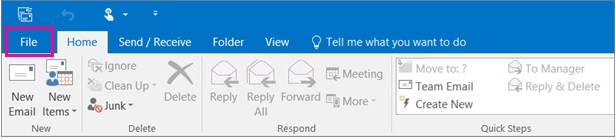
- In Outlook, go to the File
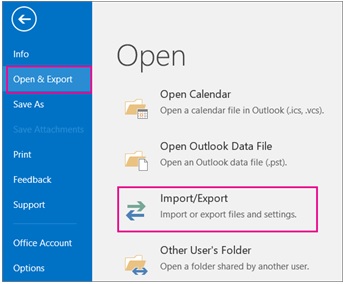
- From the screen that appears, hover over Open and Export. Next, click Import/Export.
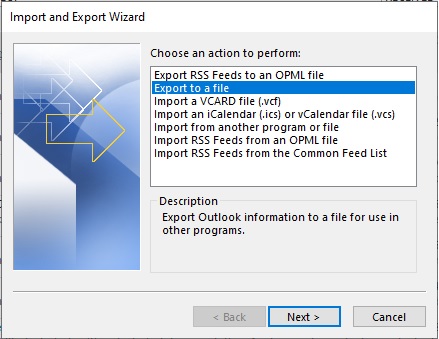
- Select the Export to a file option under ‘choose an action to perform:’, and hit the Next
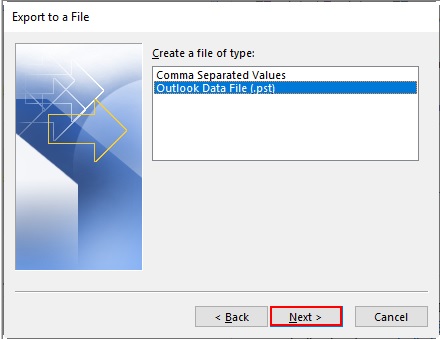
- Choose Outlook Data File (.pst) from the ‘Create a file of type:’ dialog box, and click Next.
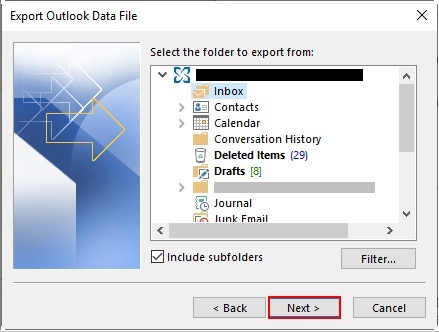
- Choose the Inbox folder, select the Include Subfolder checkbox, and choose Next.
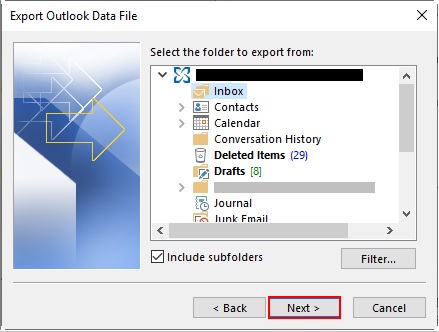
- Click Browse to specify the location of the converted PST file.
Note: To prevent duplicate emails from getting exported to a .pst file, ensure that the “Replace duplicate with items imported” checkbox is unchecked.
- Click on the Finish When prompted to enter a password (optional), you may enter a password or leave it blank, and then click on OK.
The items in the Inbox folder will get saved in a new PST file at the specified location.
Step 2: Upload the PST File to Office 365 Account
After converting OST to PST, use Microsoft’s ‘Network Upload Method’ to import the PST file into your Office 365 account. To use this method, do the following:
- Open Microsoft Office 365 admin center. From the left navigation pane, expand Setup, and then click on Data Migration.
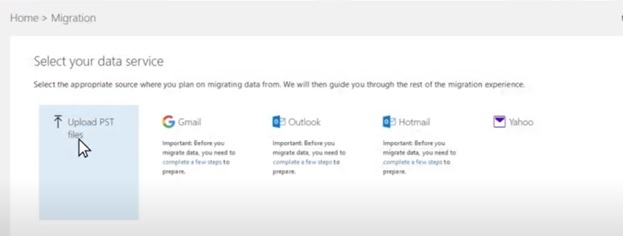
2. From the ‘Select your data service’ page, click Upload PST files.
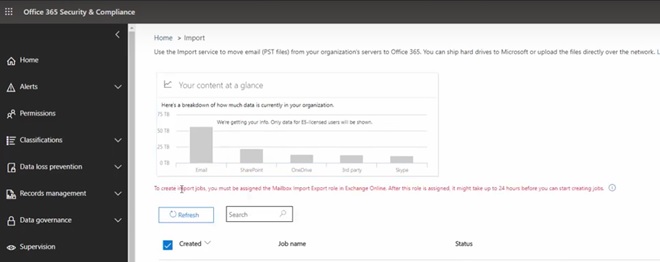
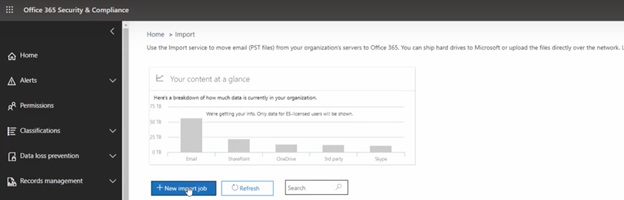
3. An ‘Import’ page will appear. You will be unable to proceed with the import process if “Mailbox Import Export” role is not assigned in Exchange Online.
Note: If you’ve already assigned with the ‘Mailbox Import Export’ role, then skip to Step 7.
4. To assign the role, login to Exchange Admin Center (EAC) through outlook.office365.com.
5. From the EAC dashboard, click on Permissions > admin roles.
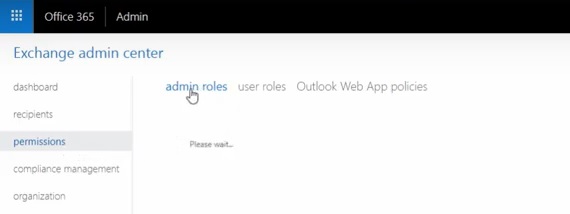
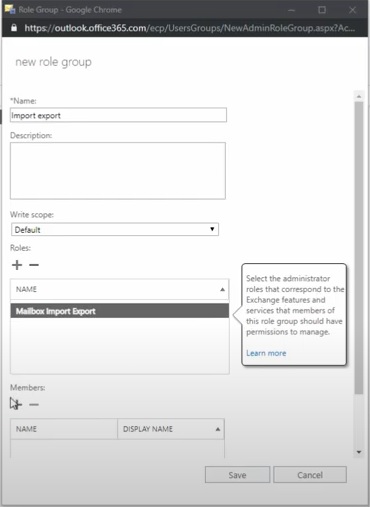
6. Add a new role group by clicking the “+” This will open a Role Group window. In the window, do the following:
- Enter any name for the new role group (e.g., import export).
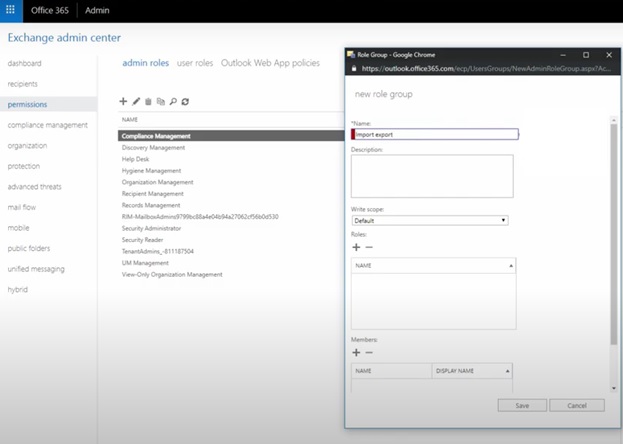
- Click the “+” sign under Roles. This opens a window with a list of roles. From the list, find and select Mailbox Import Export.
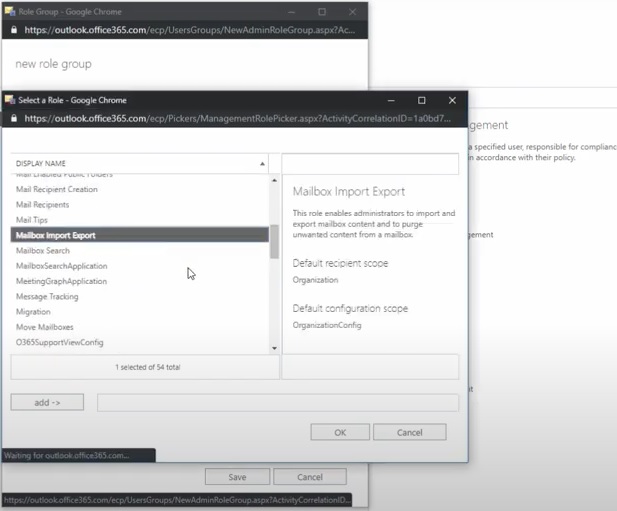
- Click on OK. Next, click on the ‘add->’ button for adding the Mailbox Import Export role, and then hit the OK
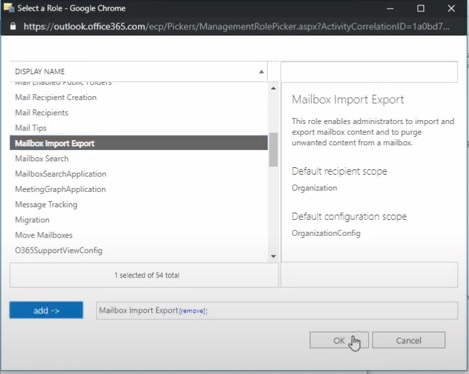
- Click Save.
Note: You will have to wait for 24 hours for the action to take place. So, it is recommended that you must assign “Mailbox Import Export Permissions” to your Office 365 account before importing PST files.
7. Once the ‘Mailbox Import Export’ role gets added, click on the New import job button from the Import page.
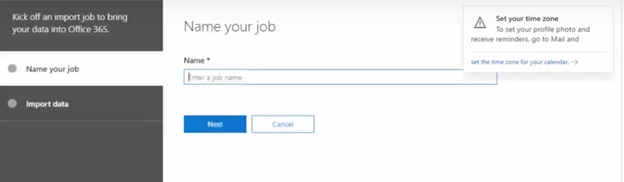
8. Specify a job name and hit Next.
9. In ‘Do you want to upload or ship your data’, you can see the Upload your data option selected. Click Next.
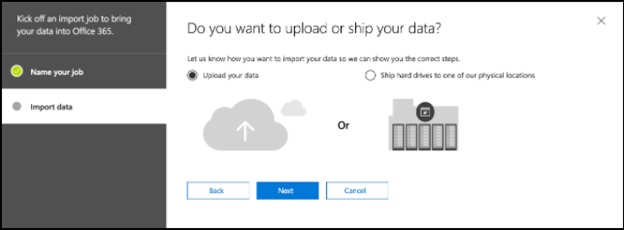
Note: You can also choose to drive ship the PSTs into O365 to perform the import job. However, you will need administrator privileges and technical expertise to use this method.
10. When the ‘Import data’ screen opens, click the Show network upload SAS URL link.
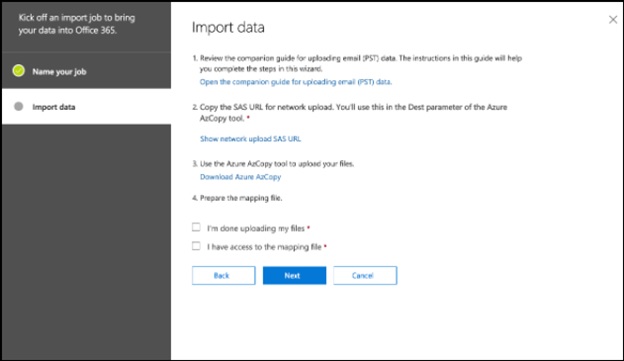
11. Copy the SAS URL and paste it on notepad.

12. Next, click Download Azure AzCopy. The AzCopy tool is needed to upload the PST files.
Note: You can also import the PST files into Microsoft 365 using PowerShell commands.
13. Download and install Azure Storage Explorer.
14. After completion of the installation process, a ‘Connect to Azure Storage’ dialog box will pop-up.
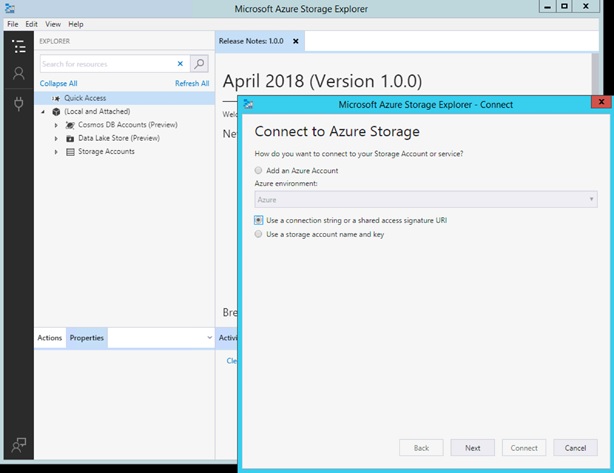
15. Choose the “Use a connection string or a shared access signature URl” option, and press the Next
16. On ‘Attach with Connection String or SAS URl’, click on the Use a SAS URl option, and then enter the SAS Url you’ve pasted in the notepad.
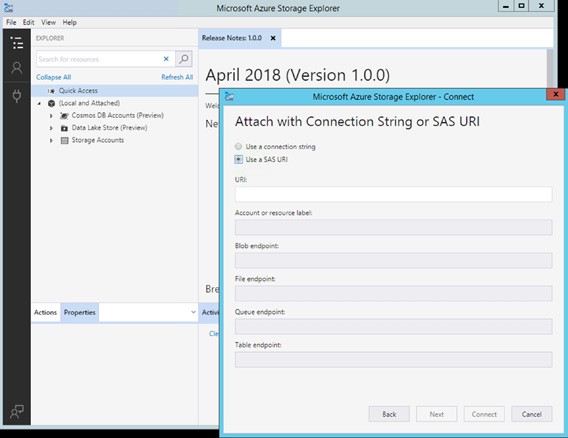
- After pasting the link, the rest of the fields will automatically populate on clicking Next.
- When the ‘Connection Summary’ window opens, hit the Connect.
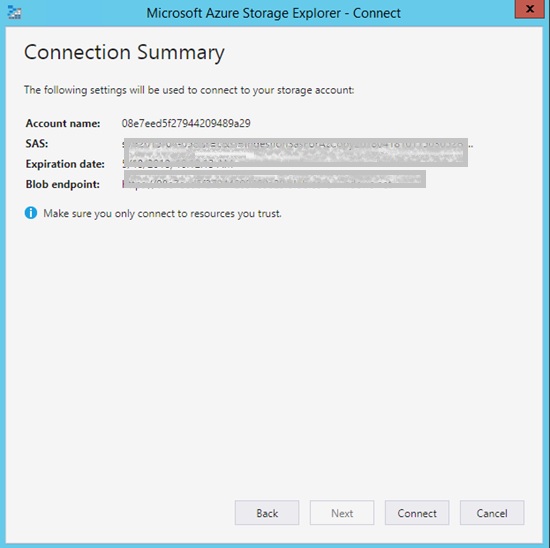
- After establishing the connection, the imported PST file(s) will be uploaded in Microsoft Azure Storage Explorer.
- Once the file gets imported, you need to create a CSV file to select the mailboxes to which the PST file will get imported.
Refer to the Microsoft documentation for detailed information on using the network upload method to import .pst file into Office 365.
Downside of the Manual Method
While this method works, it has certain downsides:
- Outlook must be installed on the system and connected to an Exchange Server.
- The upload method is not suitable for PST files exceeding 50 GB in size.
- Technical know-how is required.
- It does not directly move OST emails to Office 365.
Method 2 – Use a 3rd Party Tool to Move OST Emails Directly to Office 365
Using a third-party OST to PST converter tool can help you directly migrate the OST file items to Office 365. Stellar Converter for OST – Technician is an efficient tool that you can use to overcome the downsides associated with the manual method. Here are some benefits of using this tool:
- You don’t need Outlook connected to an Exchange Server to perform the import job.
- It can convert a large-sized OST file into PST.
- Technical knowledge or assistance is not needed.
- The software helps directly import emails from an OST file into Office 365 account.The steps to move emails from OST file to Office 365 using the software are as follows:
- Launch the software. The software’s main interface windows opens with options to Browse or Find an OST file.
- After selecting the file, click Convert.
- A preview of the OST file items gets displayed. Verify that the preview contains the data you want to import. Also, you may choose to select all or specific emails you want to import into Office 365.
- Once you’ve selected the emails, click the Save Converted File
- From the ‘Save As’ dialog box, select the Export to Office 365 checkbox and then click the OK
- When prompted, enter Office 365 email id and password and hit OK.
The emails will be imported into your Office 365 account.
Conclusion
There is no straightforward procedure to manually export emails or other items from an OST file to Office 365. You will first need to convert an OST file into PST and then import the converted PST file into O365 using the ‘Network Upload’ method as discussed in this post. However, this can take a lot of time and requires technical expertise. A better alternative is to use Stellar Converter for OST – Technician software that helps move OST to PST converted files directly to Office 365.
Author Bio:
Neha Gaurav is a technical consultant. She enjoys writing about MS Outlook tips and tricks to fix errors and repair MS Outlook PST file. In her spare time, Neha likes traveling extensively to learn about new cultures and traditions.

The Best GameStop Stores Near Me Missouri, United States
Best GameStop Stores Near Me in Missouri, It is a landlocked state in the Midwest. More than six million people…

9 Ways to Make Your Emails Interactive (+ Examples)
The internet has become increasingly accessible over time, and so have emails. In 2020 alone, more than 300 billion emails…